Infrared photography with Kenko filters
In this review I will try to consider the infrared (IR) photography using IR-filters and specialized spectral cameras. This technique is quite difficult, but we will try to explain it in the most easy way.
Contents
- How it works?
- Shooting options
- Gears options
- IR-cut filters
- IR cameras
- Lenses
- Practical part
- Shooting
- RAW-processing
- Black-and-white RAW-processing in the camera
- Black-and-white RAW-processing in photo editors
- Automated RAW-processing in Photoshop
- Manual RAW-processing in Photoshop/Lightroom
- Summary
How it works?
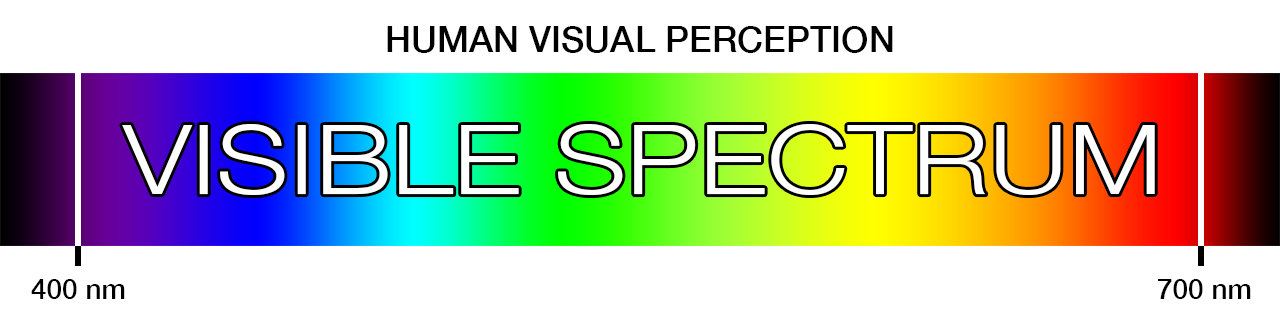
Do you know that only a short range of light spectrum between 400-700nm could be seen by the human eyes? Light waves up to the 400nm are called ultraviolet light and the waves over the 700nm - IR-light. Both are not visible by the eyes. Thus, only the visible range of the spectrum is considered as a norm for humans.
But sensors of the digital cameras has no such "lack" and originally able to capture a wider range of the spectrum. Therefore, the image from the "naked" sensor would have huge difference from the usual view for our eyes (with a predominance of blue and red colors). For this reason manufacturers of digital cameras set a special pre-filters, which are cutting off unnecessary light beyond the visible range. This is why shots made with usual cameras are so close to perception of our eyes.
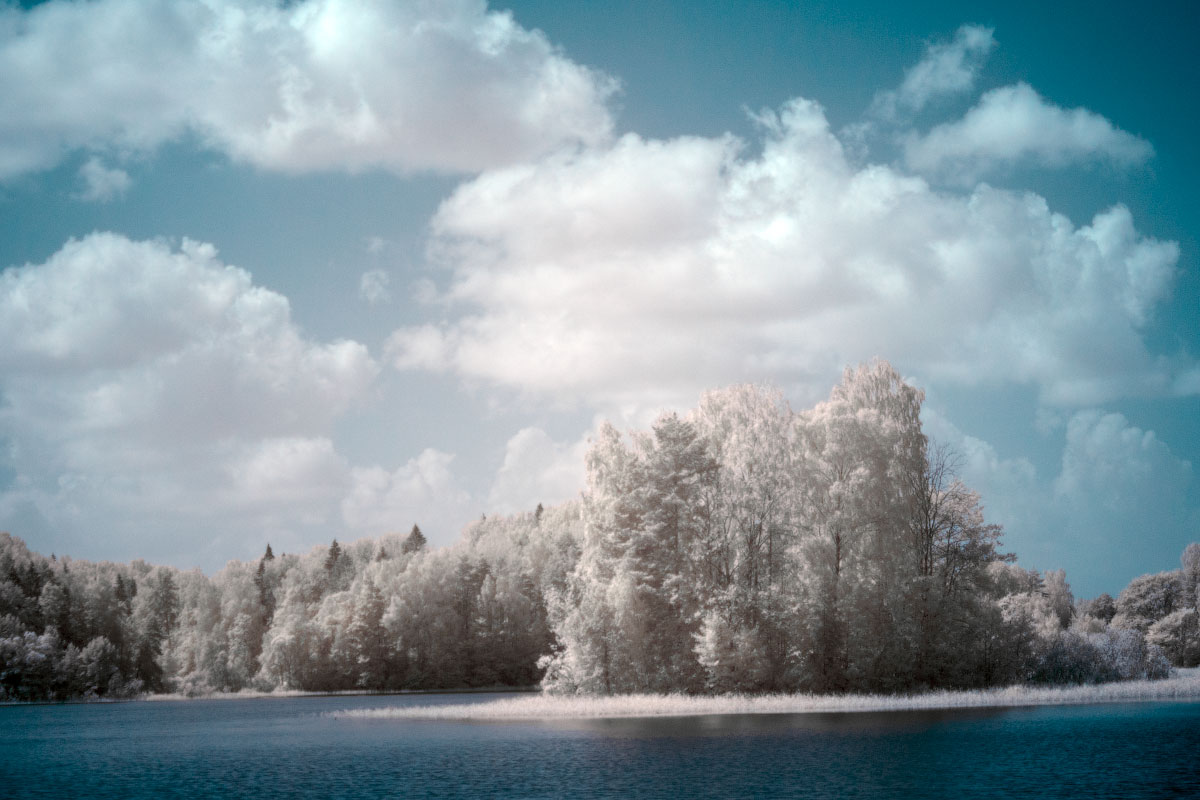
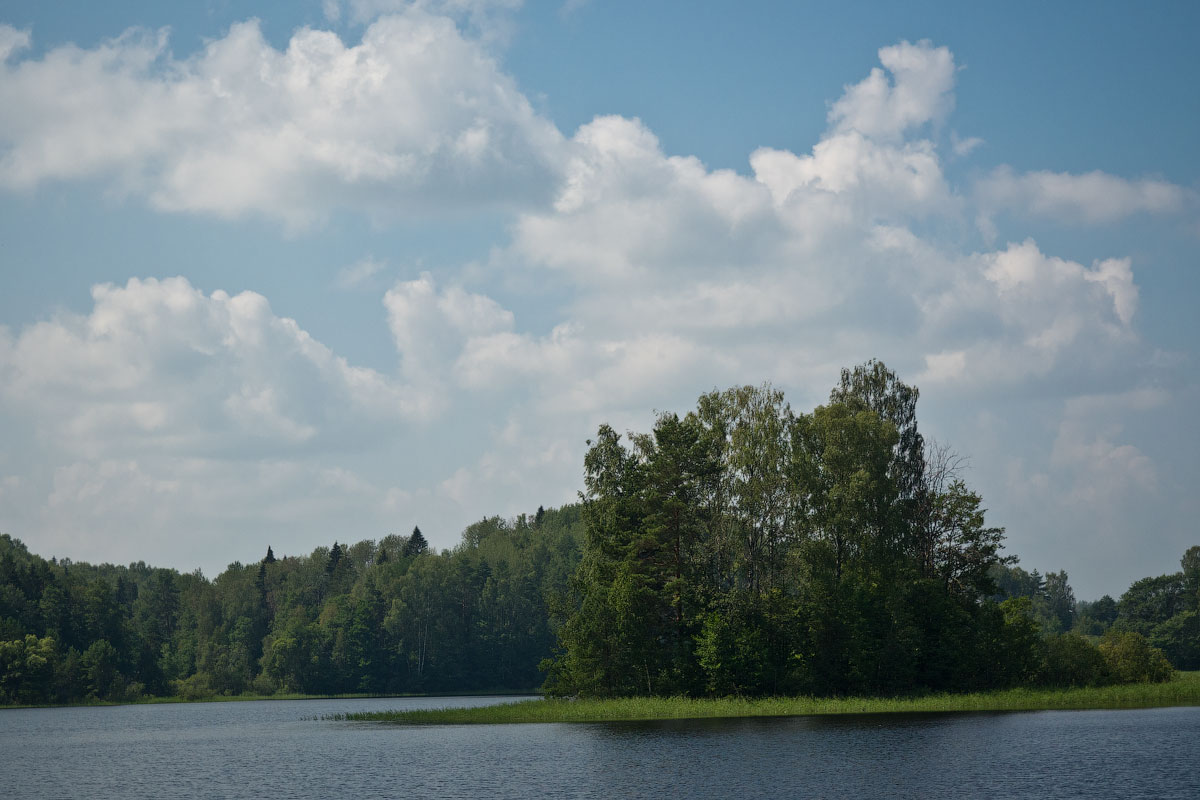
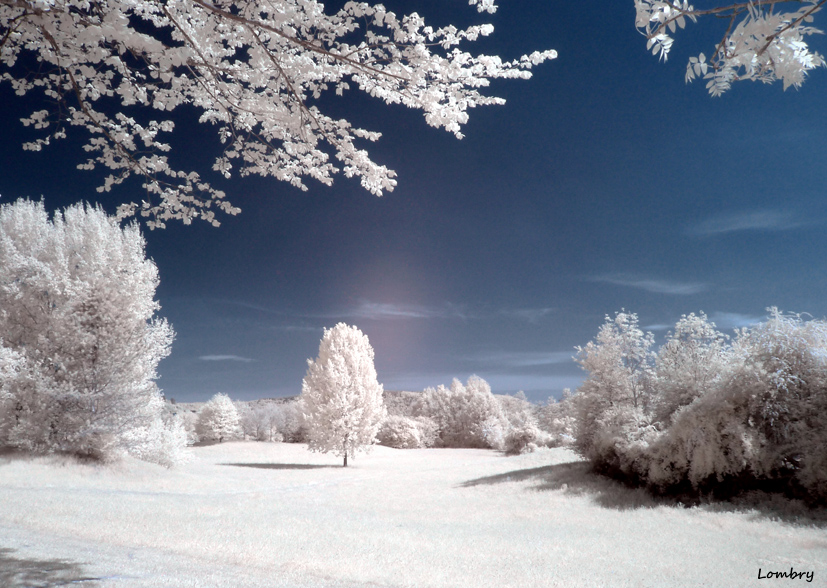
But if we are not able to see some things it doesn't mean it doesn't exist. And this is the essence of IR-photography. Using this technique, you can take shots that will be radically different from what we see with our eyes.

Shooting options
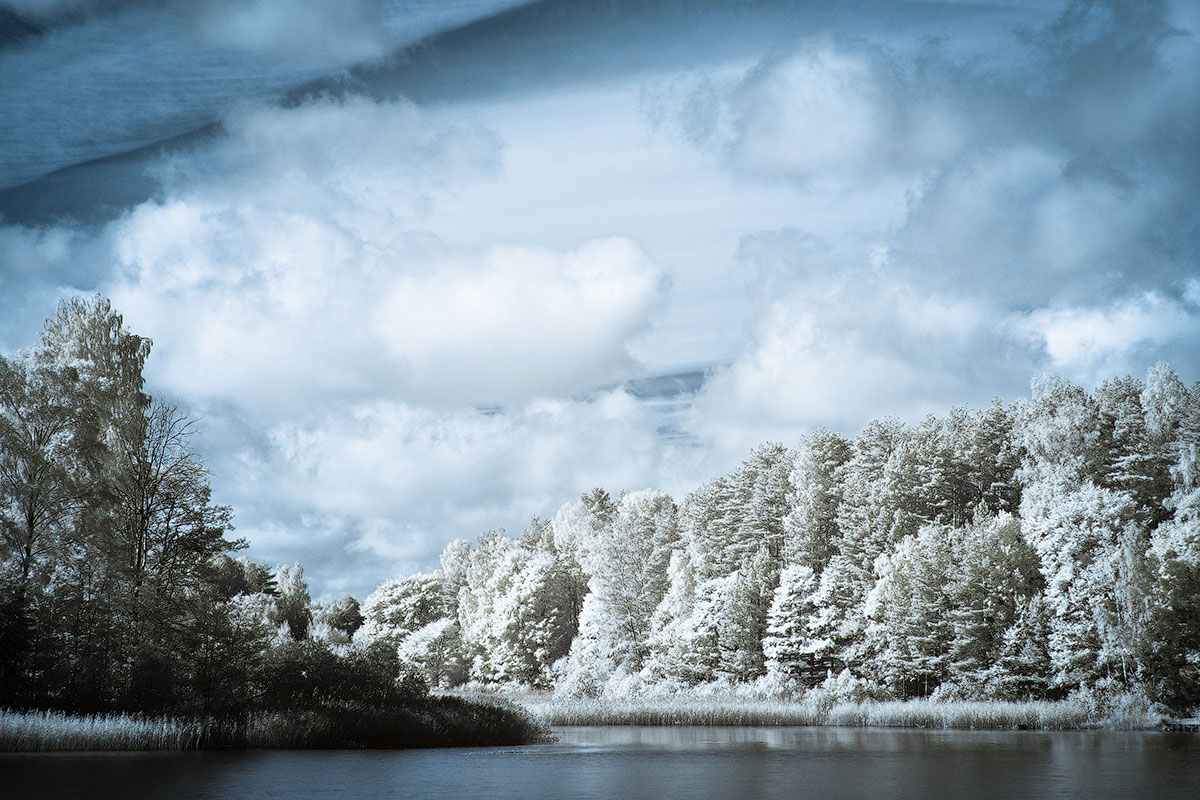
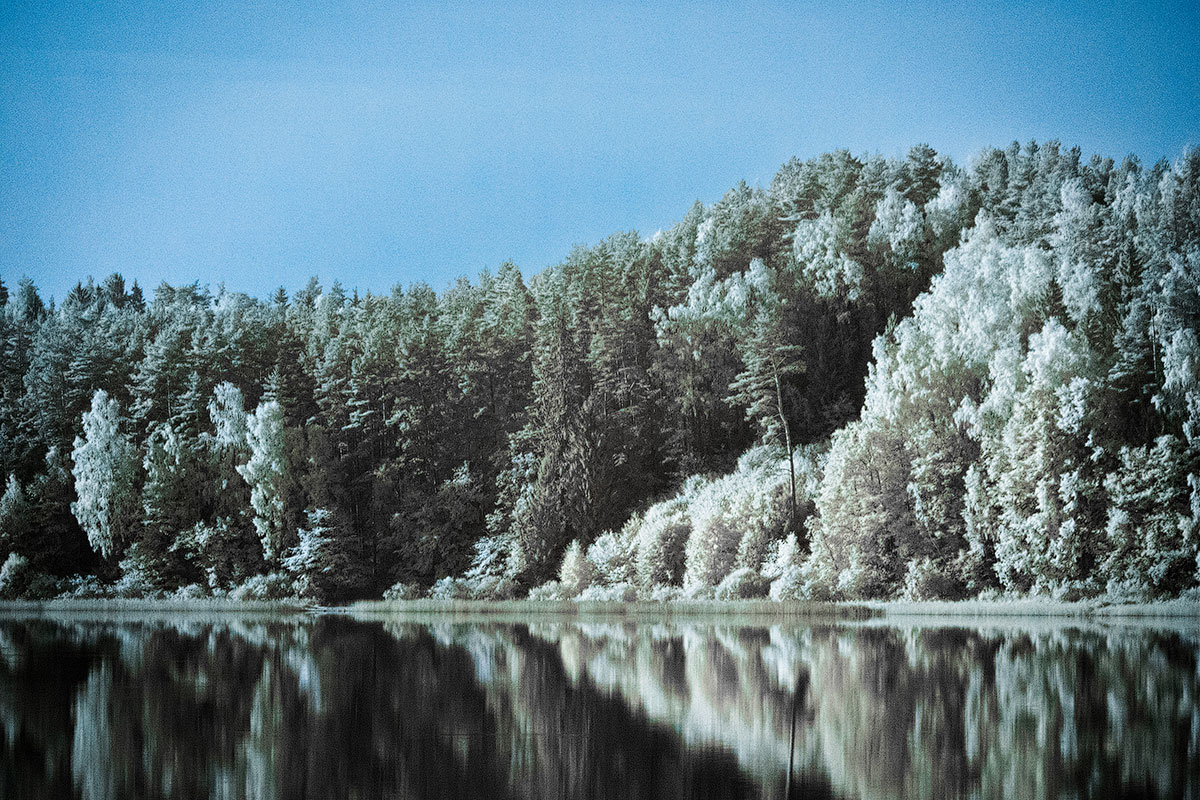
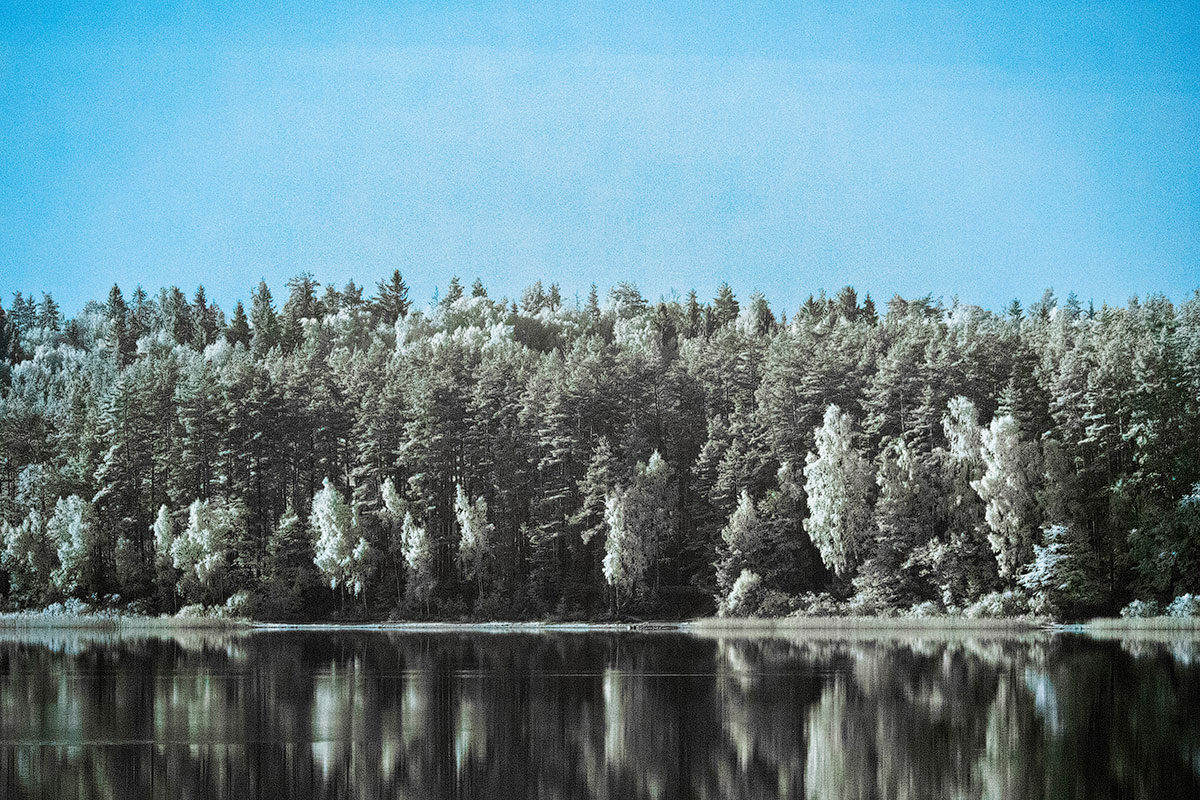
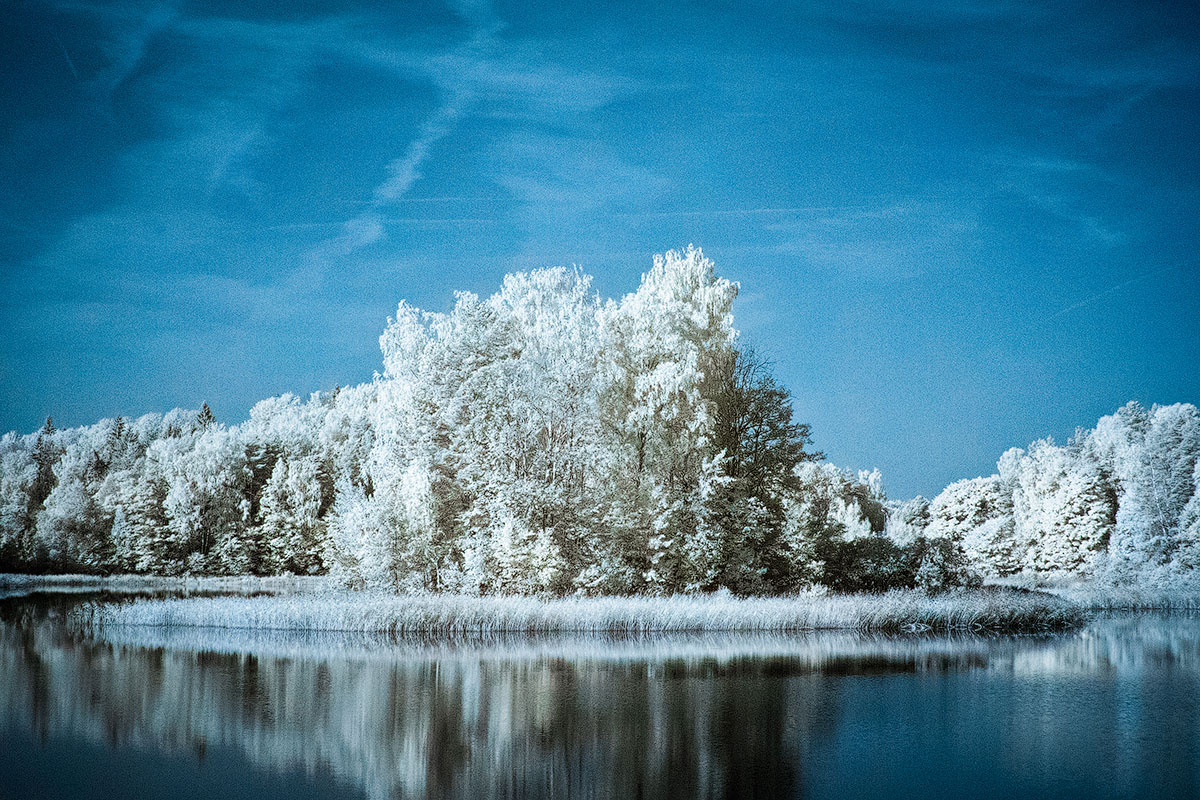
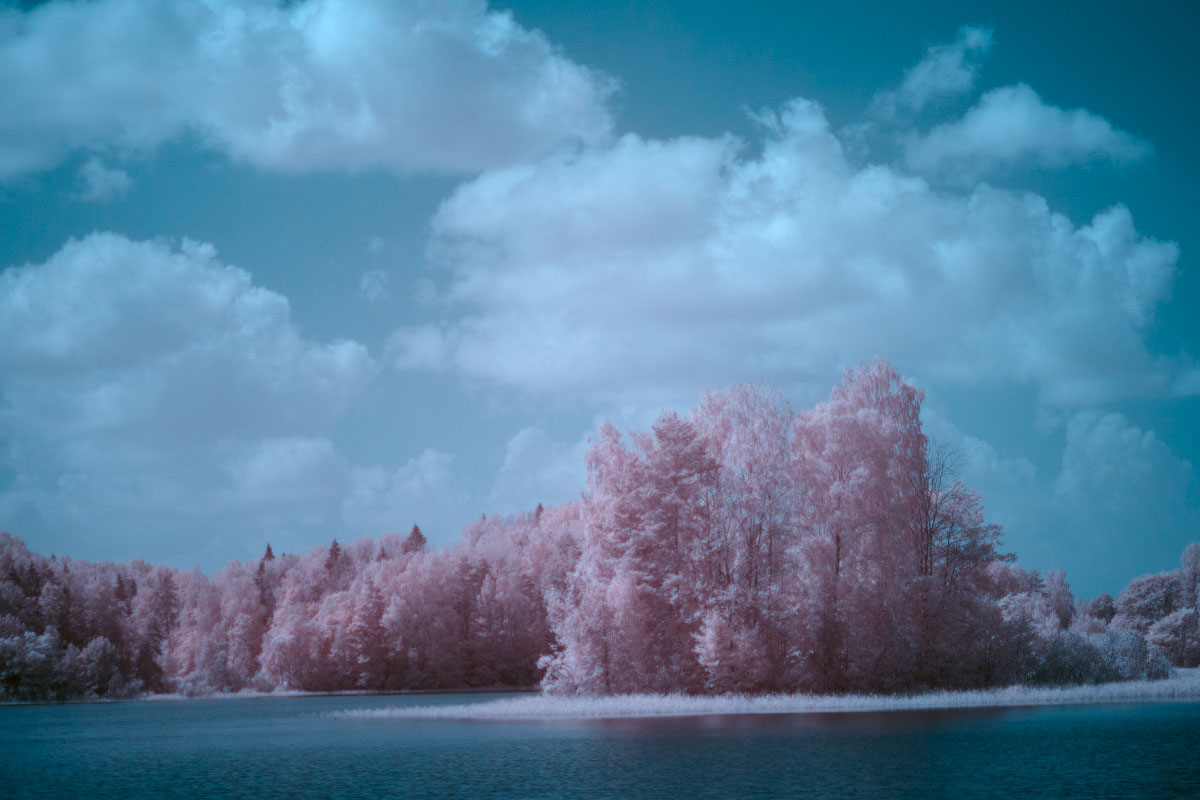
In fact, this is a genre of black-and-white photography, but the brightness here will be determined not only by the amount of light, but also the physical surface temperature. For instance the water will be dark, the foliage heated by the Sun is white and so on.


Since we are talking about photography, we can make time-lapse footages as well:
Gears options
IR-filters
Despite that the cameras have built-in pre-filters cutting the IR-light, some small part of invisible IR-light still remains and reaches the sensor. Therefore, in order to "catch" only this small amount of invisible light were developed special IR-filters, which cut off all the light except IR-range. Thus sensor of the camera gets only a small amount of IR-light. Because of this you often have to shoot with a long exposures (this point will be discussed below).
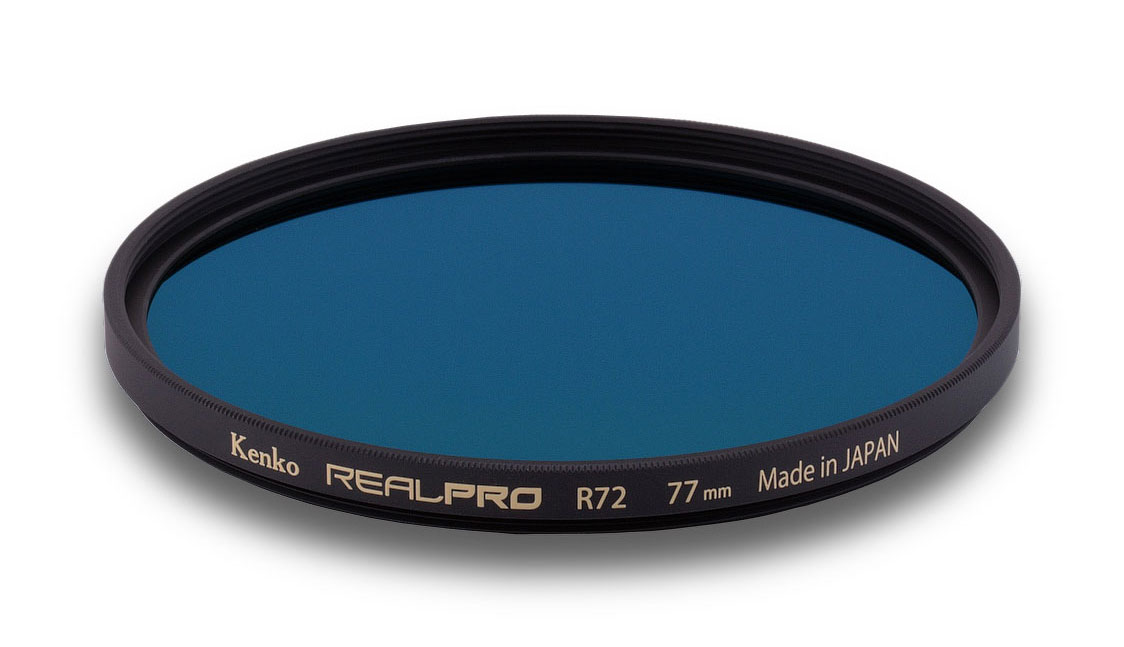
Different models of IR-filters has different cutting intensity. Many of them cutting light up to the 700nm. They still transmit small range of the visible light, but are compatible with many cameras and you can shoot with rather short exposures. Much more rarely you can be seen more aggressive filters cutting light up to 800nm. They have stronger effect, but due to the different intensity level of built-in IR-cut pre-filters, could be incompatible with some camera models and you have to shoot with extra long exposures. Also such filters are quite expensive.
In Kenko filter line-up there is REALPRO R72 filter which cuts the light up to 700nm. It might be a better choice if you just trying yourself in such shooting technique.
IR cameras
Photographers who seriously envolved in IR-photography often prefer to modify the camera. There are many ways to do that and hard to say which one is the most correct.
The most versatile way is to mechanically remove built-in IR-cut pre-filter in front of the sensor. This will allow you to clean the light from all factory pre-filtering options. And after that you can freely control the light using appropriate filters in the front of the lens. This option is good by the versatility, because allow you to use camera in any spectral range, both in UV and IR (everything will depend on the filter).
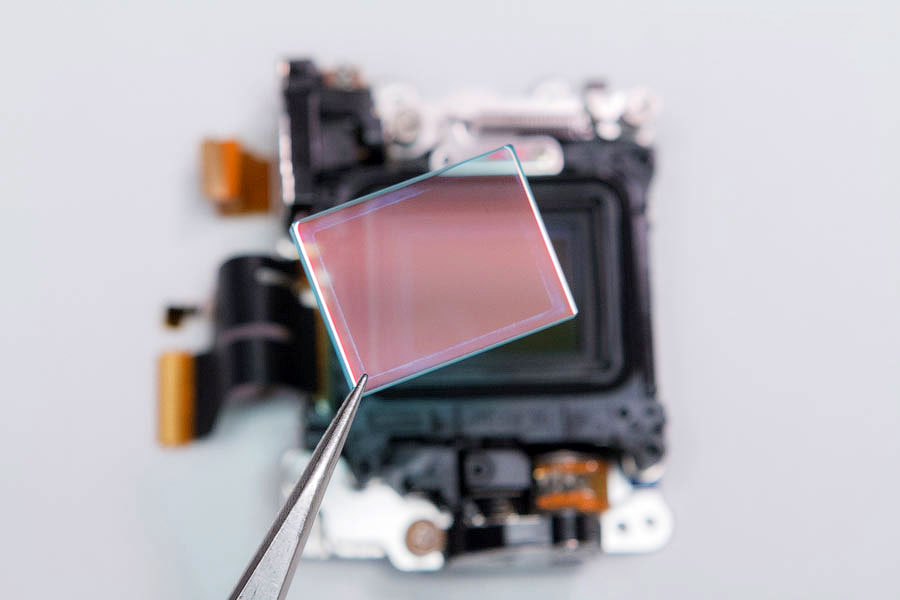
If you are interested only in IR-photography, you can go ahead in the camera modification and install the IR-filter directly on the sensor. A huge advantage of this way is that you will no longer need to use IR-filter on the lens (it will always be on the sensor).
It is important to note that this modification is quite difficult to do on your own and even a small mistake may brake the camera or its functionality. Therefore, it is better to give the camera in specialized workshops. For example, this site offers a very wide range of modifications for the spectral photography (not only for IR). Also you can buy there necessary parts and find detailed step by step guides for many cameras, if you do decide to do the modification on your own.
The apparent advantage of using the modified cameras is the ability to work with the maximum possible IR-spectrum. This allows you to shoot with faster shutter speeds and get better pictures. However, you must remember that after any of such modifications you won't be able to use the camera for ordinary photography.
Lenses
No matter which option you choose (using IR-filter with the regular camera or the camera modification), you should realize that not all lenses are suitable for IR-photography.
In fact some lenses has specific optical scheme that cause reflections in the IR-spectrum. In regular photography it is not visible, but in IR-spectrum it is expressed by the illuminated area at the center of the image, which is called the hot spot.
There is no any unified classification of the lenses compatible for IR-photography, but you can find a lists of tested lenses to certain resources. Here are few of them:
Table from http://kolarivision.com
Table from http://dpanswers.com
In any case, if there will be no information about your lens, you always can check it on your own.
Practical part
Shooting
Now let's talk about shooting techniques. Given that in IR-photography you often have to shoot with a long exposure, the technique will be largely similar to the use of high-density ND-filters.
At the beginning you have to set the camera. First switch it to the Manual mode, turn off image stabilization, recording file type set to RAW and fix ISO sensitivity at the minimum value. Also, some people recommend to switch off the noise reduction option. In some cases, these settings may affect negatively the final image, so be sure to check it before shooting.
Given that IR-shots often have problems with sharpness, set the aperture to the maximum (but don't forget about diffraction limit for your camera).
Now select the composition and firmly fix the camera on a tripod. Next autofocus on the desired object and then set the focus to Manual mode (preferably via the camera menu).
If you turn off the autofocus on the lens (by the switch or shifting the focus ring, depending on the lens model), you may accidentally shift the focus position.
Then carefully screw the IR-filter on the lens.
It is recommended to use the remote control. If not, then set the 2-second time delay. This will prevent the camera shaking.
If you shoot with a DSLR camera, you should use Live View mode, because the optical viewfinder will not show anything. In addition, Live View is often able to show the final picture with the option of exposure compensation. However, on the other hand you should be careful with the values of the EV-scale, because the exposure meter may work incorrectly in the IR-range. So before you start shooting, take a few test shots with different exposure steps. To manage exposure, use the shutter speed setting.
Unfortunately, there is no calculation chart for the exposure of the ND filters. The fact is that the density of IR-filters from different manufacturers may differ significantly. Camera modification is also important, because the volume of the residual IR-light will depend on the intensity of the IR-cut pre-filter.
RAW-processing
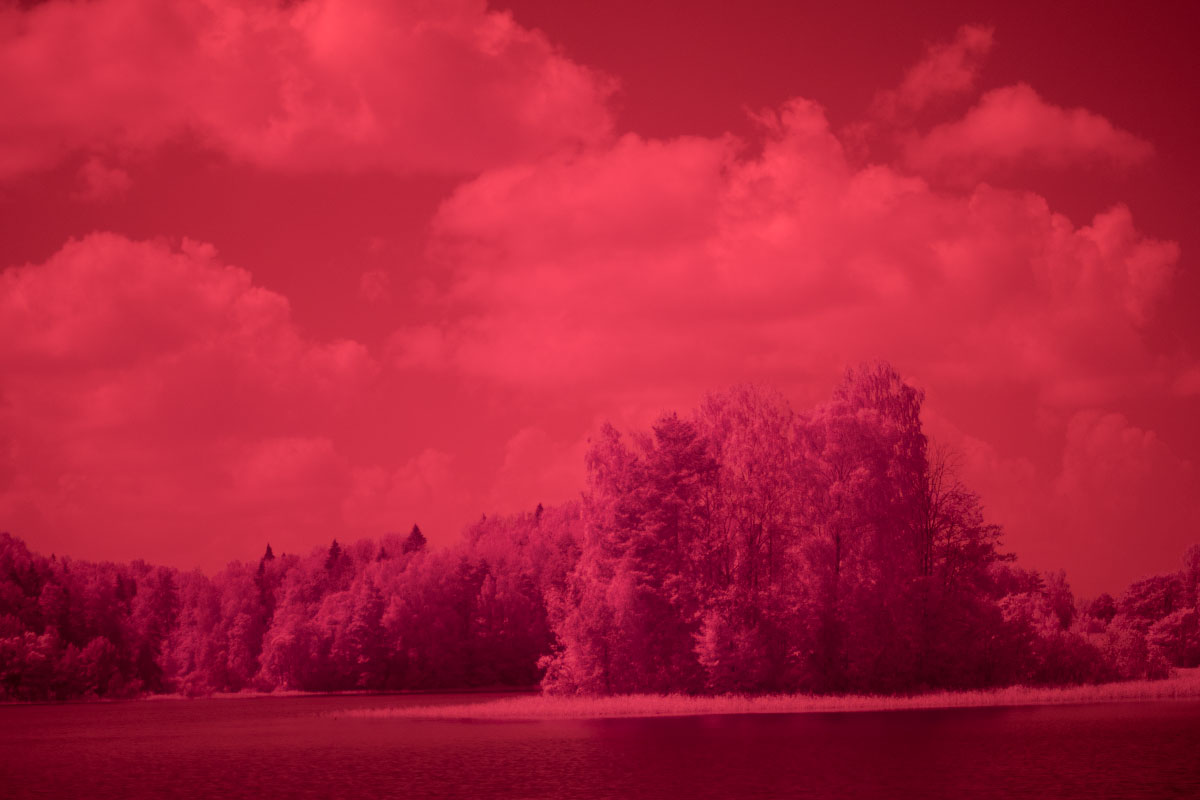
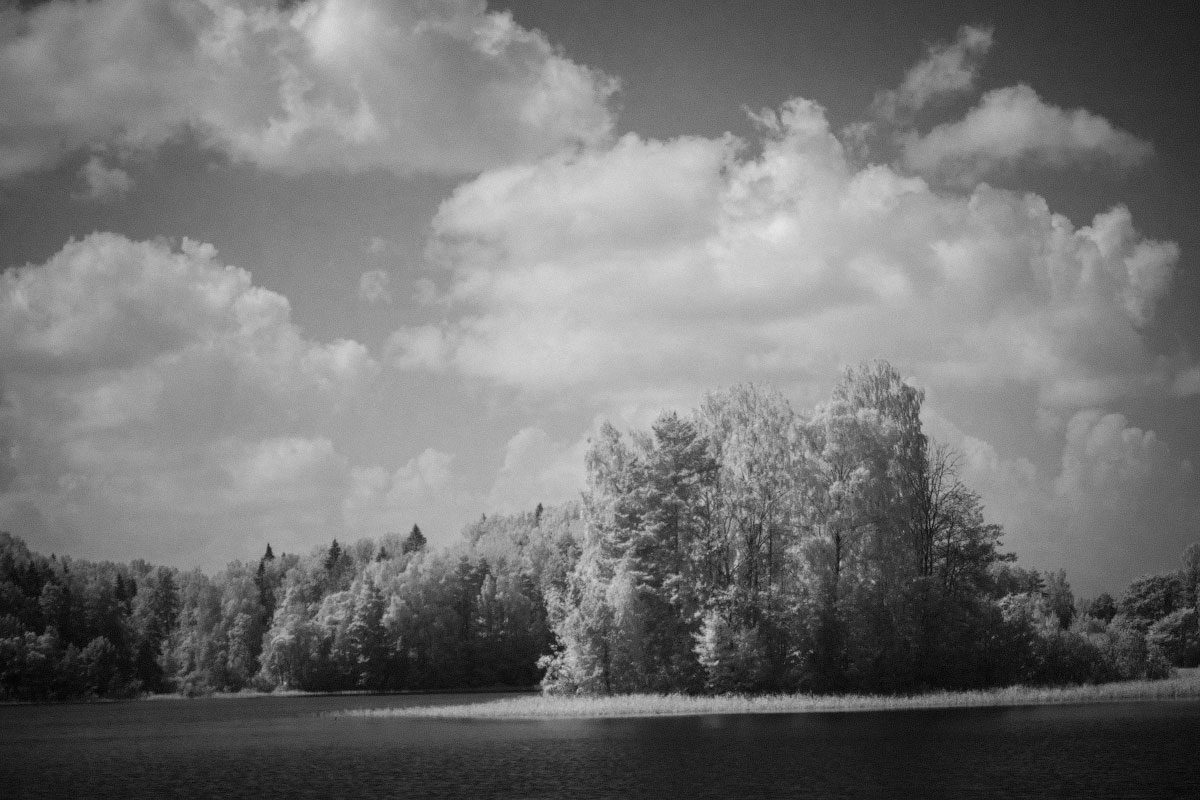
After shooting you will get (at first glance) a terrible RAW-image in red tones. Now let's consider techniques which will allow you to make a good photo.
 |
 |
This is probably the most difficult part in IR-photography and there will be a lot of technical details.But first let's consider the most simple methods of RAW-processing that will give results immediately using only the camera or the photo editor in just 1 click. For those who want to get really high-quality images, check "Manual RAW-processing in Photoshop/Lightroom" chapter of this review.
It is important to note that all of the following techniques have been taken from various resources.
Black-and-white RAW-processing in the camera
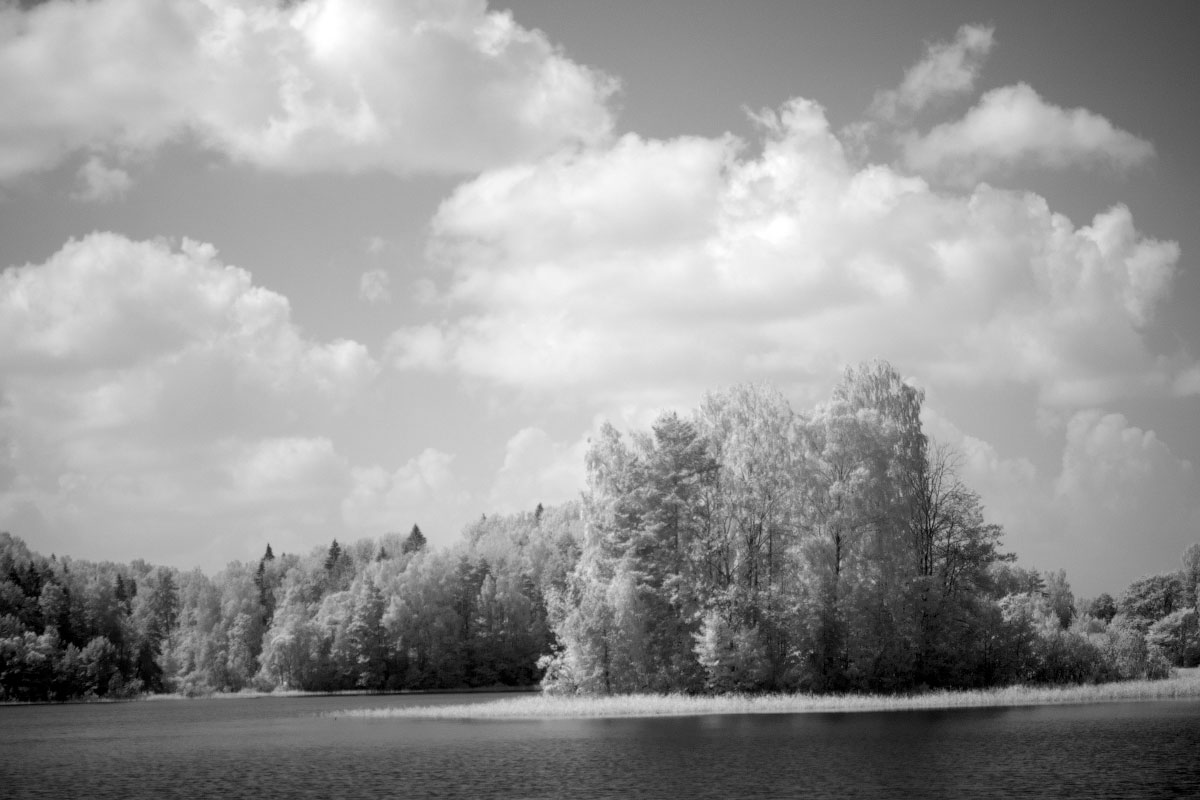
As I mentioned in the beginning of the article, IR- photography is essentially a genre of black and white photography. Therefore, the easiest way of processing will be saving your RAW-file in black-and-white colors.
Many cameras, especially entry level ones, have art-filters pre-sets similar to Instagram etc. Therefore, the "red" RAW-file can be processed directly inside the camera, applying the black-and-white art-filter. The result, of course, will be different from those that we get using other techniques, but it will still look unusual.
 |
 |
Black-and-white RAW-processing in photo editors
Editors for computers have greater functionality, so it is possible to achieve better results with RAW-processing than using the camera software. You can adjust the exposure, contrast and manage the light and dark tones.
 |
 |
Perhaps someone will say that simply converting the image from the colored to black and white is not quite right. Partly they will be right, because with the usual image a lot will depend on how to convert each of the colors. However, in our case we have the image with only the red color, therefore fine-tuning each of the colors is not necessary.
Now let's see how to make partially colored IR-shots. It is more difficult to do, because it needs to change the color channels. Fortunately there is a quick and relatively simple option. On the Kolari Vision website there is a ready set of scripts for Photoshop. All you need is to open your "red" RAW-image and apply 1 of 5 scenario.
That's all :)
 |
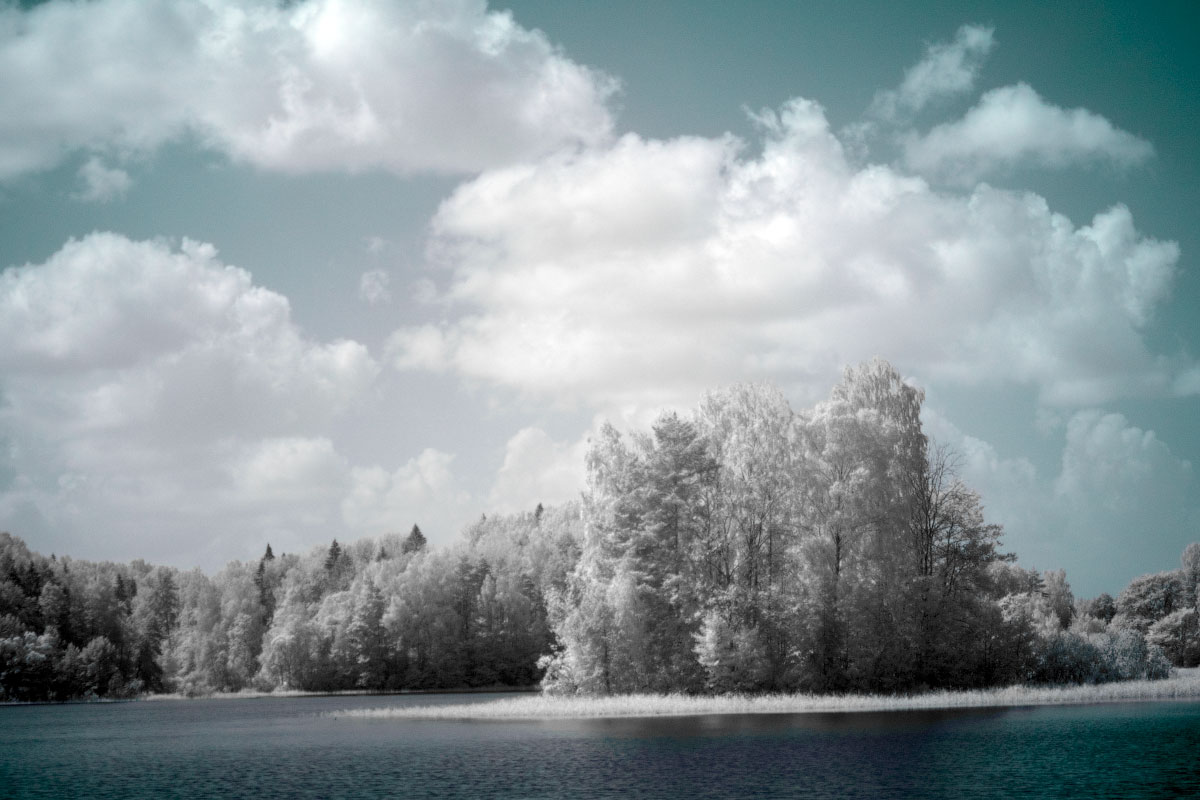 |
Manual RAW-processing in Photoshop/Lightroom
Well, after shooting we have a RAW-file in red colors. For further processing we need "Adobe DNG Profile Editor".
There are versions for Windows/Mac and "Adobe Photoshop" or "Adobe Lightroom" editors.
Step 1: Making the camera profile
Now we have to make the camera profile (this is a one-time process). First you need to convert any RAW-file from your camera to a DNG-file. If you do it in Photoshop, after you open the RAW-file, you will see a dialog box for the "Camera Raw" plug-in, which you need to click the "Save As" button to save file in DNG. If you are using Lightroom the procedure is even easier - just open the RAW-file, open the "Export" menu and choose the DNG file format.
Then you need to run "DNG Profile Editor" and open this DNG-file. In the opened window choose "Color Matches" tab and move the temperature slider to the far left (most cold) position.
Next go to menu "File > Export [camera name] IR profile" and save the profile in any temporary directory (you can use any profile name, but it should be clear for you). The similar procedure should be done for all cameras you plan to use for IR-shooting. And finally the profiles should be placed in the certain folder so "Lightroom" and "Photoshop" can see them.
It should be noted that Adobe often changes the location of the profile folders for new versions of its applications. So we'll give the path location for the most recent versions. If they do not work with your current version, we recommend to follow the Adobe support forum. We are sure there you'll find the actual path for your version.
Profiles should be placed into this folder:
MAC: MacintoshHD/Users/[yourusername]/Library/ApplicationSupport/Adobe/C ameraRaw/CameraProfiles/
Windows: X:/Users/[yourusername]/AppData/Roaming/Adobe/CameraRaw/CameraProfiles/
Some users who are using current versions still complain that the paths above do not work. In this case Adobe recommend to use these paths (Adobe applications can use few profile folders at once):
MAC: Macintosh HD/Applications/Adobe Photoshop Lightroom X/Right-click Show Package Contents/Resources/Camera Profiles/
Windows: X:/ProgramFiles/Adobe/AdobePhotoshopLightroomX/Resources/CameraProfiles/
After restarting the applications the camera profiles should be visible.
Step 2: Initial processing in "Lightroom" or "Camera Raw"
Now you can proceed directly to processing. As an example I will use "Lightroom", but the same procedures you can do in "Camera Raw" add-on, which launches when opening a RAW-file in "Photoshop".
Please note, the procedures in the "Step 1" is a one-time procedure, therefore the processing for all IR-shots should always be started from "Step 2".
So, when you open your RAW-file, first you should go to "Camera Calibration" section and apply the IR-profile of your camera we made in "Step 1". Then go to "Basic" section and adjust white balance so that foliage becomes white. We recommend you to use eyedropper tool on the leaves with fine-tuning using the Temp. and Tint sliders.
Now the picture looks much better. Also, if necessary you can make crop and adjust exposure, contrast etc.
Step 3: Final processing
If initial processing was in "Camera Raw", then just click the "Open Image" button and your image will open in "Photoshop". If processing was in "Lightroom", then just select "Edit in Adobe Photoshop" option in pop-up menu.
Now, when you are in "Photoshop", you need to mix color channels (red color should be replaced by blue and vice versa - blue by red). Go to menu "Image > Adjustments > Channel Mixer". Here choose "Red" for "Output Channel" and in the "Source Channel" section set "0%" for "Red" and "100%" for "Blue". Then do the same for blue color - choose "Blue" for "Output Channel" and in the "Source Channel" section set "100%" for "Red" and "0%" for "Blue".
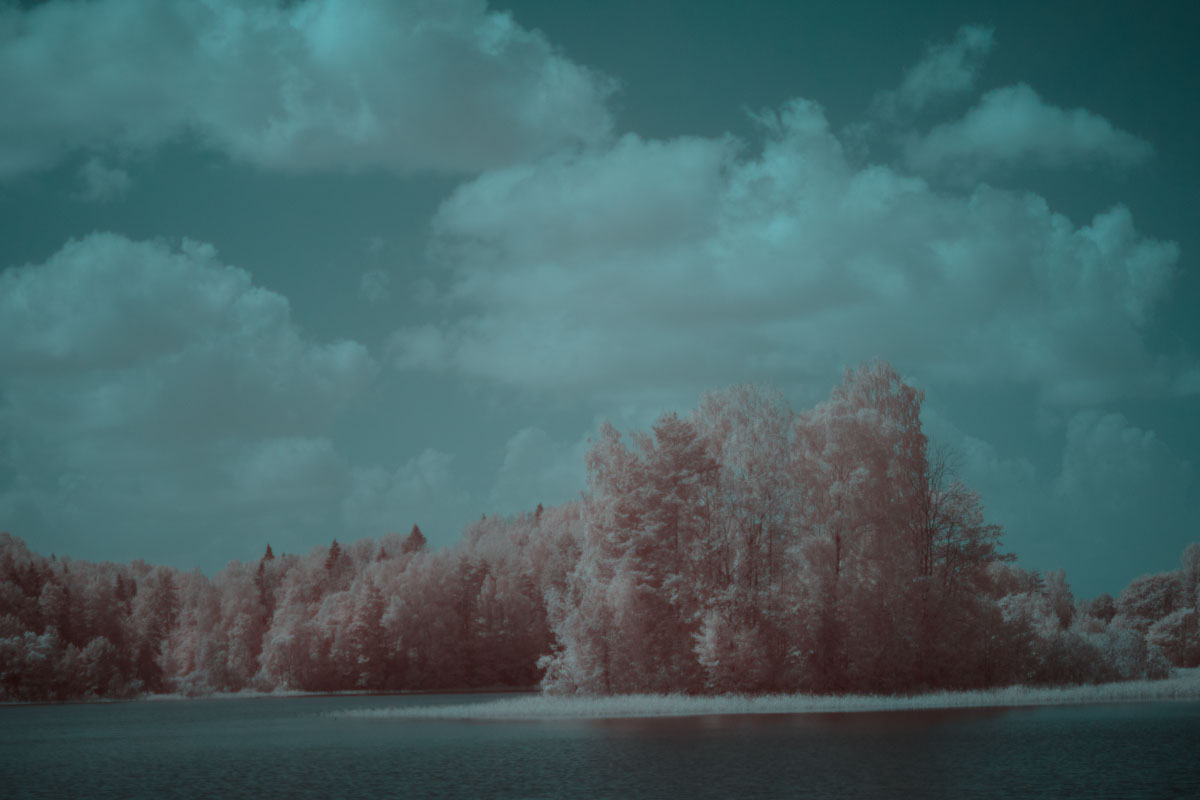
Now your image is quite close to the final result and everything will depend on personal preference. For example, you can go to "Image > Adjustments > Levels" and slightly adjust the red and blue channels.
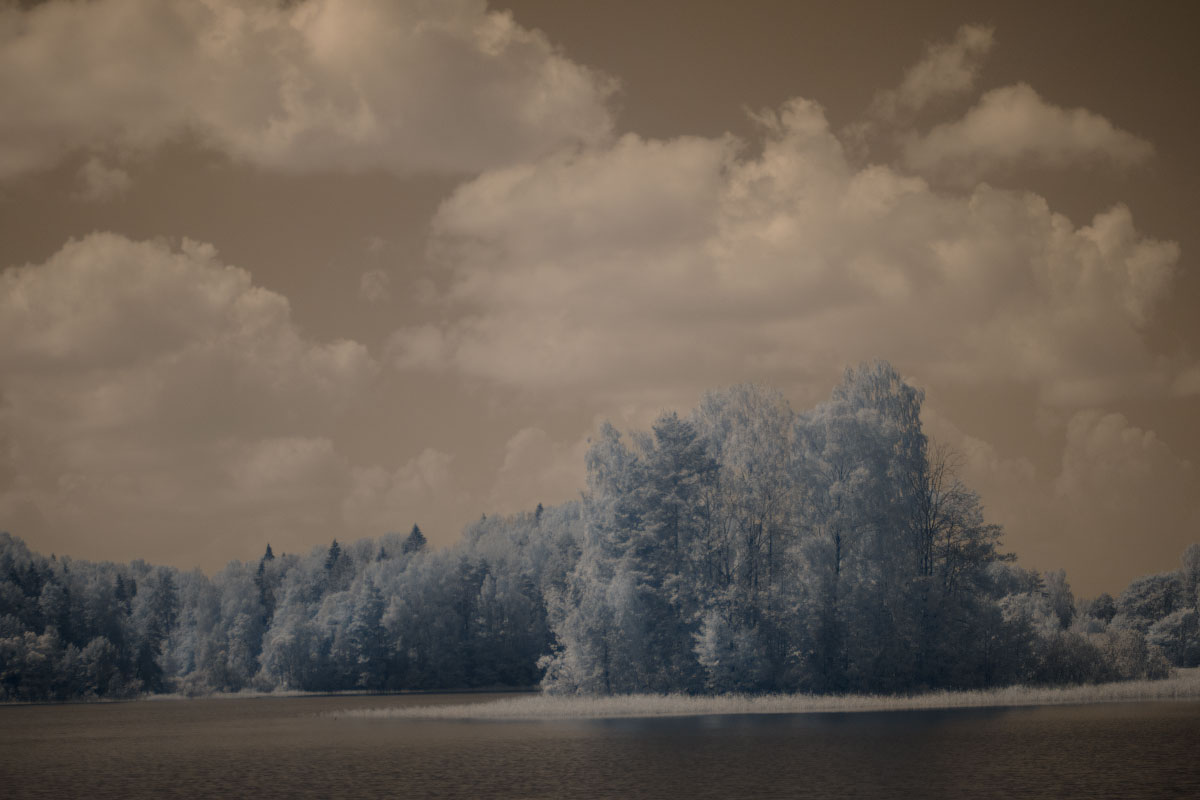
And eventually go to "Image > Adjustments > Hue/Saturation" and adjusting tint, saturation and brightness of blue color (sometimes of cyan) and decide what to do with red color. Usually, people prefer to remove the red, making the foliage completely white. However, sometimes yellow could be good looking and you can change the hue.

That's all and the only thing you need is to save the file in the desired format.
Summary
IR-photography is another genre which unfairly has lack of attention. This quite difficult technique requires a lot of time and serious investment in the equipment and accessories. And also it forces the photographer to think completely different. But creativity does not have easy ways.
Not everyone may find this technique interesting, but surely there will be those, to whom this article will help to make their first steps in this genre.